Here is a picture of what you will be making:

![]()

A casual outfit for Ken. Make the shirt in tiny Hawaiian print!
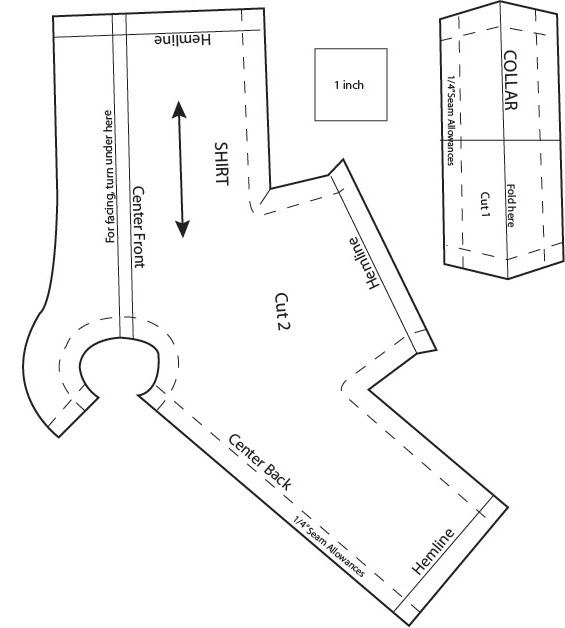
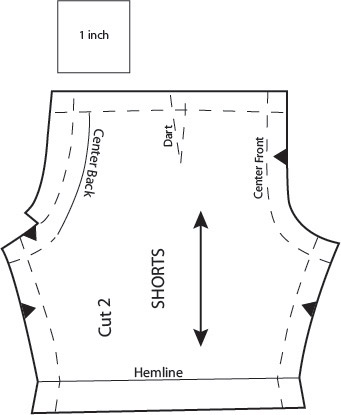
The pattern will print on two pages:
Instructions for saving and printing jpg or pdf files are here.
Download pdf file of Ken’s Shirt and Shorts
Instructions for Sewing Ken’s Shirt and Shorts
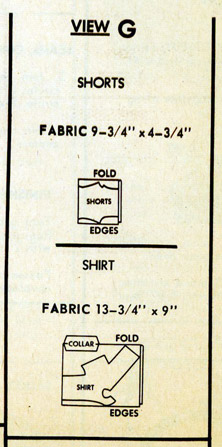
Layout for Ken’s Shirt and Shorts:
SHIRT
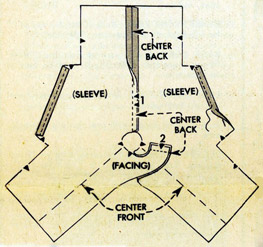
1. CENTER BACK SEAMS Join back seam of shirt, and also facing extensions RIGHT SIDES TOGETHER. Press seams open.
SLEEVE HEMS Turn under on lines indicated, stitch 1/8″ from edge to form hems:
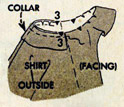
2. COLLAR Fold right sides together on line indicated; stitch ends. Trim seams, turn and press:
3. Clip neck edge of shirt and facing section a full 1/8″ along inner curves. Baste Collar to neck edge of shirt on OUTSIDE, matching notches and center backs:
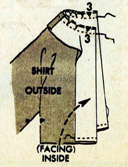
4. Turn facing sections to OUTSIDE on lines indicated. Pin to neck edge (over collar) matching center back seams. Stitch neck edge; trim seam. Stitch lower ends of facings on hemlines. Turn facings to inside; press:
UNDERARM SEAMS, LOWER HEMS, etc.
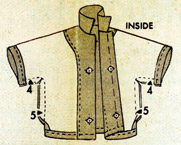
5. Join entire underarm seams. Clip at inner corners as indicated on patter. Crease seams open. Turn lower hem on line indicated; press. Stitch 1/8″ from inner edges of facings and a full 1/8″ from lower edge:
FRONT CLOSING
Lap left front over right, matching centers; fasten with 2 snaps.
SHORTS
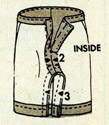
6. Sew darts with RIGHT sides together. Press towards center front seam. Sew center front seam; clip along curve; press open.
Turn under seam allowance on upper and back extension edges above circles, clipping along curves; edge-stitch.
LOWER HEMS Turn under hemlines, stitch 1/4″ from turned edge:
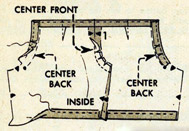
7. SEAM Join center back seam below circle; clip LEFT seam edge to circle; press seam open, clipping along curve. Join inner leg seam matching center seams and making lower edges even:
8. FINISHING Turn under RIGHT back opening edge on center line, press. Lap backs matching centers; fasten with snap:

